SDXL Turbo - Detailed Indepth Guide for Patreon Subscribers
Added 2023-12-11 16:02:41 +0000 UTCSummary
With SDXL Turbo you will be able to generate images in just a few steps, in many different interfaces. This guide will show how to get it running in automatic1111 and ComfyUI.
SDXL Turbo stands out as a remarkable engineering achievement. Its Turbo feature enables lightning-fast generation of vast numbers of images. Currently, Comfy leads the pack in utilizing this technology. While Comfy delivers undeniable speed and quality, A1111 comes remarkably close.
Due to the limited generations per image, any error correction or modification time is non-existent. Furthermore, as Turbo is currently confined to a specific model, quality and resolutions regress to the baseline SD level. While some subjects yield incredibly good results, others fall short. Nevertheless, the technology holds promise and might become a game-changer in the future.


Download the model
Base model (See below for updated custom models)
You will first need to download the SDXL Turbo model, which can be accessed from the StabilityAI website here: https://huggingface.co/stabilityai/sdxl-turbo/tree/main

The sd_xl_turbo_1.0_fp16.safetensors file will be the one you want. To download this, just click on the downward pointing arrow.
Improved custom models
There are now improved custom models that increase the quality, I would recommend trying one of these over the base model.
https://civitai.com/models/215418/turbovisionxl-super-fast-xl-based-on-new-sdxl-turbo-3-5-step-quality-output-at-high-resolutions
https://civitai.com/models/129666?modelVersionId=242718
How to start using SDXL Turbo in ComfyUI
Here’s a video guide to get ComfyUI running: How to install and use ComfyUI - Stable Diffusion.
To download ComfyUI, you will want to go to the following URL: https://github.com/comfyanonymous/ComfyUI#installing Note, you’re going to need either 7zip, or something capable of extracting files in a 7zip format (.7z).
You’re also going to want the ComfyUI Manager- a utility designed to assist with managing and updating nodes in ComfyUI. The instructions for installation can be found here: https://github.com/ltdrdata/ComfyUI-Manager Please be aware that you will want to have git installed ahead of time, the instructions for which are available at the link provided.
Once ComfyUI has been fully extracted on your system, you will want to place the SDXL Turbo model into the checkpoints directory. This can be found in the following path:
.\ComfyUI_windows_portable\ComfyUI\models\checkpoints

If you have modified your setup to share your models between frontends, you will want to place it in the appropriate location.
Once you are in ComfyUI, you will see a box on the right side of your browser window which shows the basic standard functions of ComfyUI.

Drag & drop your image or workflow into Comfy to load the workflow. You can also click the load button. You can drag & drop this fox in a bottle to load a workflow.

Why is everything red?

At this point, you may experience red squares, signifying that you do not have the SDXL Turbo custom nodes required to run SDXL Turbo just yet. This is the reason why we installed the Manager. Click on the ‘Manager’ button below the ‘Load’ button we used earlier to bring up the ComfyUI Manager interface.

Once in this screen, you’re going to want to click on several different options. First as noted above, Update All will attempt to take care of anything missing right now. You likely will be prompted to restart after this (note: the RESTART button is part of the prompt screen.) After that, return to the Manager and if you still see red boxes, click on ‘Install Missing Custom Nodes’, after which again you likely will be prompted again to restart. After this second restart, you should be fully up and running and there be no more red boxes on your screen.
How do I start Generating?

In the CLIP Text Encode node, you will want to enter your prompt. During testing, short, concise tokens seemed to work significantly better and more consistently than long drawn out tokens. Also you will want to change the ‘control_after_generate’ option to increment or randomize or whatever value you wish- having a static seed here for initial testing is fine, but when you want to get various generations, you’re going to need something that can change.
After you have your prompt set and your seed adjusted, now it’s time to click on the ‘Queue Prompt’ button.

This will run through the workflow and you will receive a preview image. To save the image, you will need to use the Save Image node connected to the VAE decoder. You can either enable the disabled one from the workflow, or double click and create a new "Save Image" node.

How to start Using SDXL Turbo in Automatic1111 (a1111)
Although A1111’s response time does not quite match that of Comfy, its ease of use and ready-made tools make it a great UI.
Here’s a video guide on how to install and get started with Automatic1111: How to Install Stable Diffusion - automatic1111
If you have not already downloaded A1111, it can be accessed at the following URL: https://github.com/AUTOMATIC1111/stable-diffusion-webui Please note if you have already downloaded A1111 in the past, you are going to want to make sure that you are updated to version 1.6.0 or later in order for SDXL Turbo to be supported.
After downloading A1111 through your method of choice, to start it you will want to click on the webui-user.bat.

See top of this guide where to download SDXL turbo model. After you have downloaded it, it will need to be placed in your Models\Stable-diffusion directory before it can be used.

There is an additional option that we can use as well to increase our images to SDXL standard resolution, but is not necessarily required for core functionality. As SDXL Turbo images are 512x512, increasing that to 1024x1024 can drastically increase their quality. To that end, we can use a tool that has been around in A1111 for a long time- highres fix. This utility has a number of different models that it is capable of using by default. A popular custom model is the 8x_NMKD-Superscale_150000_G model available here: https://huggingface.co/uwg/upscaler/blob/main/ESRGAN/8x_NMKD-Superscale_150000_G.pth
This file will need to be placed in the your models\ESRGAN directory to be available for use in A1111 (Note, you’ll want to have A1111 off, or restart if you add this on after it’s already running)

Best Practices for SDXL in A1111
To say that less is more with SDXL Turbo would be an understatement. Standard settings for SDXL can be completely thrown out the window, as we’ll be dialing most everything back to near minimums. First, you will want to set your checkpoint to SDXL Turbo. In the upper left corner of the screen, you will see your ‘Stable Diffusion Checkpoint’. Click on the downward pointing triangle to select your Turbo model.

Next, we’re going to want to set the Sampling method to DPM++ SDE, 2M Karras, Euler A or similar. Not all samplers can run SDXL Turbo, if your output is not looking good, change your sampler. We’ll also want to set our Sampling steps to 1 or 2 for the base model or 4 for custom models. 1-4 generally works, and it varies depending on the model.

Our Width and Height will need to be set to 512 each, and the CFG set to 1. While you will still get results at higher values, the quality immediately drops off.


Finally, we are ready to enter our prompt. SDXL prompting requires few keywords, so keep it simple. For the image above, prompt was: a Cherry Tree in bloom.

Generations for all practical purposes at 512x512 are near instantaneous. As such, you can afford to be selective about exactly what you want and what kind of overall look and feel you’re looking for. The developers have mentioned that Turbo is on the weaker side when it comes to photoreal quality content, but stylized generations seem to work quite well.
Select any styles you may want and click generate.


How to go further with A1111
As mentioned before, we can get significantly more detail out of these images if we use some of the available tools in A1111. The first we can add on is ‘Hires fix’. While this will increase the amount of time per generation significantly, the quality of the output is far higher. To activate Hires fix we will want to click on the triangle on the ‘Hires Fix’ box in our Generation tab.

If we placed the upscaler model in the correct location earlier, when we click on the downward pointing triangle, it will be available to select. The Denoising strength can be set between 0.35 to 0.6. This is mainly because there just isn’t enough time to allow this to add on additional content (like with regular SD models), so we want to focus more on improving what is there. With a lower value, this will stick more to the existing image rather than trying to create new data. Finally, we will want to make sure that our Upscale by is set to 2. This will then make our end result images 1024x1024 with our initial values still set at 512x512.

After this, we can click on Generate to see our higher resolution image get generated.

512x512, no additional processing.

512x512, Highresfix to 1024x1024

Live painting workflow
Drag and drop the workflow into your ComfyUI (see link below)

Install any missing nodes through the manager. You will likely not be able to install AlekPet's custom nodes from the manager, so download them from this link https://github.com/AlekPet/ComfyUI_Custom_Nodes_AlekPet
Installing using Git
- Install Git
- Go to folder ..\ComfyUI\custom_nodes
- Run cmd.exe (Type cmd in start menu)
- Enter git clone https://github.com/AlekPet/ComfyUI_Custom_Nodes_AlekPet.git
- Run ComfyUI
Select Extra options -> Auto Queue
Start by pressing Queue Prompt

Paint!
Comments
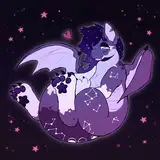
Hey Jakub. I would advise you to look at the newer Flux content, which has significantly higher prompt understanding. Should make your animals easier to produce.
Sebastian Kamph
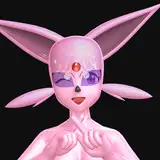
2024-09-18 09:42:14 +0000 UTCHey, everybody. No matter how hard I try, I can't figure out how to make an image with a beast, frog, girl or monkey work. It always comes back with a green colored blob. What am I doing wrong?
Jakub Omrt
2024-09-17 17:15:11 +0000 UTCHey, if you go into the manager and click install missing custom nodes, you should find the ones that you need. If not, you can check the terminal and see if there's an import failed. In that case, you have conflicting nodes and need to remove the ones that conflict.
Sebastian Kamph
2024-02-17 11:04:58 +0000 UTCFigured it out myself Image scale to side is from https://github.com/Derfuu/Derfuu_ComfyUI_ModdedNodes and Seed is from https://github.com/WASasquatch/was-node-suite-comfyui Both need to be in custom_nodes folder
Weidong An
2024-02-17 04:46:22 +0000 UTCHi Sebastian, Thanks for the detailed tutorial. When I load the Livepaint_SDXL_Turbo.json, I got When loading the graph, the following node types were not found: - Seed - Image scale to side Nodes that have failed to load will show as red on the graph. Do you know what I am missing?
Weidong An
2024-02-17 04:29:16 +0000 UTCHello, dragging and dropping the Live Painting workflow doesn-t work for me, could you please help? When I drop the png just notheing happens. Dropping the fox-in-the-bottle image works on the other hand
Andrea Avellino
2024-02-08 12:14:12 +0000 UTCHi, see the last part of the guide to manually install AlekPet's custom node not available from the manager.
Sebastian Kamph
2024-01-27 12:43:53 +0000 UTCHi, I'm getting this error: "When loading the graph, the following node types were not found: PainterNode". Using ComfyUI, not sure how to solve it.
Jelsafa Beltrão
2024-01-24 21:29:32 +0000 UTCIs it true that this model uses more VRAM? I have RTX3060ti 8Gb and I can't run any prompt. Getting error CUDA out of memory.
Andrey Semjonov
2024-01-04 20:45:20 +0000 UTCI'm glad it helped! 😊
Sebastian Kamph
2023-12-15 21:06:29 +0000 UTCWow, so glad you posted this. I'm generating a large pool of christmas themed images to stream on my TVs during the holidays. It was slow going until now.
Tom Moss
2023-12-15 15:45:22 +0000 UTCSorry, I don't know this error. I recommend you post with screenshots of settings and error in my Discord #help channel
Sebastian Kamph
2023-12-12 15:50:13 +0000 UTChello, I use google translate to explain my problem to you: samplercustom gives me the following message: "exception when validating internal nodes: tuple index out of range" and I don't understand the problem. thank you for your help and continue... a non-bilingual French ;-)
JACQUES COURTOT
2023-12-12 15:32:49 +0000 UTCIt requires a prompt, and can be a little finicky sometimes. It isn't great with small lines, so make sure you use a lot of colour. Combine clear prompting with clear painting.
Sebastian Kamph
2023-12-11 20:41:50 +0000 UTCHi Sebastian and thanks for this guide! the live painting works weird for me, there's no real connection between what I paint and the results, even when no prompt is entered. have a clue why?
Eran Mahalu
2023-12-11 17:40:47 +0000 UTC