![[Progresswork] Heyday](https://img5.illustratorsleak.com/storage/8/co/oa/dbda34-019e8530-0f47-747c-bd5b-20962f7e17f0.jpg)
![[Progresswork] Heyday](https://img5.illustratorsleak.com/storage/8/cu/ih/dbda34-019e8530-0f4c-70e5-a3bf-11366a5a5c89.jpg)
![[Progresswork] Heyday](https://img5.illustratorsleak.com/storage/6/al/gn/dbda34-019e8530-0f50-7010-ae0f-4c59ac5cd3da.jpg)
![[Progresswork] Heyday](https://img5.illustratorsleak.com/storage/10/fn/yj/dbda34-019e8530-0f53-78c9-a57d-6b4256c78a2a.jpg)
![[Progresswork] Heyday](https://img5.illustratorsleak.com/storage/4/oc/nd/dbda34-019e8530-0f6c-76ea-a04e-d913097a118d.jpg)
![[Progresswork] Heyday](https://img5.illustratorsleak.com/storage/12/bx/qh/dbda34-019e8530-0f77-7d0e-8913-14abfcaf405e.jpg)
![[Progresswork] Heyday](https://img5.illustratorsleak.com/storage/6/vf/yr/dbda34-019e8530-0f7c-7761-8cf0-aa4f11f0d4f9.jpg)
![[Progresswork] Heyday](https://img5.illustratorsleak.com/storage/1/ao/jd/dbda34-019e8530-0f81-7318-97b6-c44b9897c198.jpg)
![[Progresswork] Heyday](https://img5.illustratorsleak.com/storage/1/th/jp/dbda34-019e8530-0f83-74e9-a808-35ae2e3cb1e2.jpg)
Since this piece happened across one official stream and three subsequent sessions (even if there were year-long breaks between phases), it's still fresh in memory and decently documented. The various checkpoints you can see above and read about below are a bit more segmented than usual, since the nature of the painting had me instinctively finish one part before moving onto the next, as it has clearly divided phases - background, water, Koruscar - that required three different brush settings and philosophies.
I also decided to start including a 100% zoom set into these breakdowns, just to give a sense of scale I usually work with as well as what are some of the details that make a larger whole.
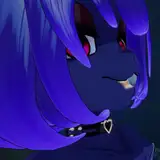
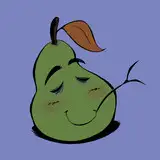
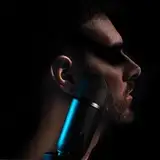
1) Base idea was very rough. I just threw my (almost) freshly made elementalist into the festival that made a comeback in the game after some four odd years, and wanted to doodle him playing around at the Cliffs, since he's usually quite reserved and shut in, but loves playing with elements, water included.
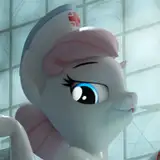
2) Rough idea becomes a basic sketch. I originally wanted to emphasize the underwater part, with the various coral reefs and sea life present in the Labyrinthine Cliffs bay, but that angle ultimately made it kind of awkward, with rocks sticking out of nowhere and the second charr's placement being confusing with no visible shoreline.
This is the part where the basic proto-painting got stashed to the folder with unfinished ideas to be picked up at some later point. Later point then happened the following summer, when the festival returned to the game and I was searching for a piece to work on during an official stream.
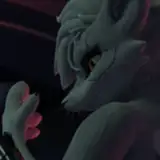
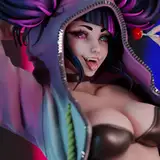
3) At this stage, Koruscar's anatomy got refined to it's more or less final version, with proper base coat of colors and shading added to the character. Somewhere early after this point, I usually stop considering the piece to be a sketch.
This is where we were left shortly after the official stream, which means another year-long break.
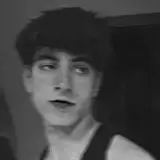
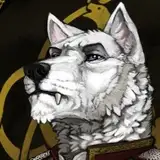
4) First thing I did after coming back to it was fixing the water line, which became completely disjointed from the original idea in the meantime and screwed the perspective a lot (not captured here, but you can see it in the timelapse.) Kirruak was also one of the last things to be added to the picture, so far in the form of a slightly shapely dark blob.
5) Next order of business was to finish the background so I can focus on the charr in front (while I did work on him, too, by fixing his anatomy a bit and refining the face, not much has changed). Water surface received a bit of a blue sheen to reflect the sky above properly, but is otherwise still in the same sketchy phase.
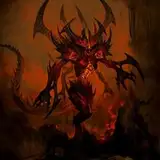
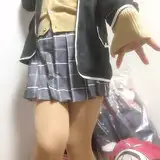
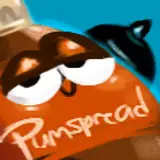
6) This step focused on getting water out of the way. Ripples and foam on the surface, reefs and anemonies underwater and the general fur detailing on the submerged part of the body. Painting submerged fur really sells the motion you're trying to show - rapid movement will result in hair sleek against the body, while floating or stopping abruptly results in this sort of a poofy effect, where separate hairs each act as its own flotation device. I also decided to add a hint of the seabed as it's not that far to the shore. (There should technically be even more visible, but it was trimmed down to not clutter the image in sector I wanted mostly clear.)
7) Adding final effects and contrasts and finishing the piece. (Mostly by lots and lots and lots of fur rendering). Knowledge of physics comes into play again - if you know that water naturally filters red light first (which is how things underwater get that greenish-blue tint), you can use it to your advantage and ad a little bit of reddish hue to the water and things close to the surface, which will give the whole mass a more natural sense of depth. Be careful not to overplay this effect though, since it's very gradual and barely noticeable in this kind of water volume.
And here it is when all put in sequence:

BONUS ROUND:
Tips on how to paint water.
While I can't pretend to be an expert in this field or this example being a prime specimen of realism (it's a little bit too blue for stylistic purposes, among other things), I believe I can offer a tip or two. Water is one of those things that are very specific to paint. It's something we see every day in action. We see it while we drink, while we shower, while it rains or whenever we pass by a river or a stream or a seashore. At the same time, it's one of the things that require extensive knowledge of its properties to get it right.
I'm not going to go into much detail here, because this post would result in a wall of text, but there's generally five points I keep in mind while working with water:
It's partially reflective.
Especially the water's surface acts like a partial mirror, reflecting the sky (when viewed above) or the seabed (when viewed from underwater). Just like any mirror, it has to be angled just right to bounce light straight into the viewer's eye, which is how the ripples are cavalcade of colors - some just let light pass through (meaning transparency), some are angled so they perfectly mirror the sky above, some are somewhere in between, resulting in a ghost reflection.
It blocks certain parts of the light spectrum better than others.
The reason sea is blue is simple - blue light has the easiest time passing through. Red gets caught first, then yellow, green, teal and finally blue. The deeper you go, the fewer colors you'll have, until you finally have no light at all. As mentioned above, this effect is very gradual (talking several meters for visible difference), so don't go ahead and get gradient-crazy on character just standing knee-deep in a pool, but even a five, six per cent shift in hues will still register with whoever looks at the piece.
It doesn't have the decency to stay still.
Most annoying part of working with water, at least to me. It constantly shifts, ripples and moves, but it does so slower than the light that carries the information, resulting in some really cool, but really hard to capture effects. Every ripple on the surface serves as a lens, so unless your water is standing in completely wind-less and tremor-less conditions with very little sharp light, you have a carpet of convex and concave lenses wreaking havoc on whatever it is you're painting under water. There's a lot of thinking about which surface reflects what and how much, which wave focuses light and which scatters it... But once you realize it's there, it gets much easier to do right.
It can have a color of its own.
Water is not naturally blue (as noted above, it simply eats blue light the least), but it can have a color of its own. It can be green with algae, brown with sand or mud (or reddish with certain clays) or even yellow or red with specific bacteria. The degree of coloration depends on the amount of non-water particles, but it can add another round of variables to the mix. The point above, however, still applies.
It distorts and breaks light passing through, giving objects in it a bit uncanny qualities.
Due to the way light bends and breaks, objects tend to appear flatter and a bit distorted (as you can remember from all those "magic breaking pencil" tricks your physics teacher likely tried to amuse you with when you were a kid). This is something I mostly just learned from tons of reference photos (as those don't make your eyes burn if you open them, unlike saltwater), and I can recommend stalking some horse enthusiasts, since they tend to love taking pictures of their animals decapitated by the water level for some reason (... translated to non-creep language: they like to show photos of their horse's swimming as viewed from below).
Water also makes for great practice, at least for me, to get my brain into the game and think about volumes of the objects I draw. A useful bit of artistic advice that I took from my sculpting days is trying to imagine what would the thing look like if submerged in water - where would the surface be. (For some reason I don't really understand, you can't tell my brain it's math, or it shortcirquits, so I imagine it in water and it works... Mother nature, I have questions.) Since the surface is essentially a plane in and of itself, it works out.
If you've made it this far, congratulations, and I hope this post was an interesting read for you. Thank you for your time and patronage, stay safe and see you next time!